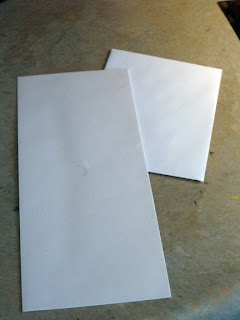
 The base of the bookmark is made from the corner of an envelope. You can use any size, I have a business-sized envelope and a card-sized envelope pictured above. You can use regular-sized envelopes as well, but your bookmark will be smaller. These work the best if you know that you'll be using your bookmark in a small, paperback book. So, you might want to think about what size you need (how big or small your books are) before you start. For my bookmark, I used a business-size envelope.
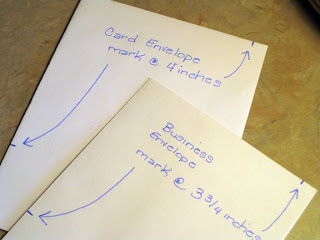 Seal the envelope first. Then, make a cutting mark with pencil as shown above:
*business-size envelope mark at 3 3/4 inches at the top and at one side
*card-size envelope mark at 4 inches at the top and at one side
I'm sorry, I don't have the measurement if you use a regular envelope. Just measure the envelope and see how tall it is and make your marks about 1/8-1/4-inch smaller than your measurement.
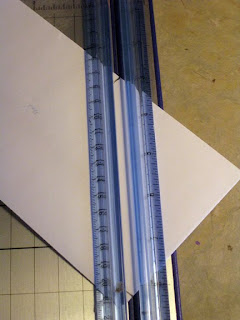 Place the envelope in your paper cutter so that you can see the cutting mark lines. Center the lines in the center of your paper cutter and then cut the envelope. If you don't want to use a paper cutter or don't have one, simply draw a line from one pencil mark to the next and then cut. You can also draw the line and then cut it with your paper cutter. This helps if it's hard for you to see exactly where you need to cut your envelope.
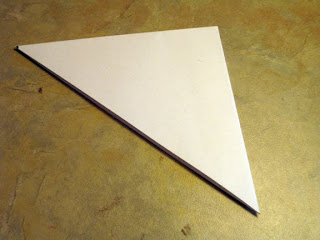 You will end up with a triangle, that has one open side, like a pocket. I forgot to mention that you can sometimes make two bookmarks from one envelope, if it's long enough to cut the corners off of each side! This would also be a great recycling project. You could use junk mail envelopes, because we will be covering the envelope with paper and that would hide any printing, etc.
 The next thing that I did was to figure out how I wanted to decorate my bookmark. You can do this first, of course, but I usually get my bookmark base done first and then I start pulling out things that I think I might want to use to decorate my bookmark with. Sometimes I already have an idea, but a lot of times I don't. This time I didn't, except that I knew I needed to use a die-cut for the Practical Scrappers Challenge and I was leaning towards using my paisley one. So, I pulled out my sticker binder first and started flipping through it. I knew that I wanted a word of some kind on there and I found this sticker w/ a Bible verse on it. I liked that it was about "hope" because I really need to be putting my hope and faith in God better, so that's when the rest of it came together. I started going through my paper scraps and found the paper (one pattern for the front and one for the back), then I went through my blue color drawer and found some paint swatches. I liked this one because the name of the paint was "Inner Harbor" and I thought that was pretty fitting for a bookmark about hope.....God is my Inner Harbor. Whatever you decide on, just be sure to think FLAT. You don't want to use buttons, brads, eyelets, Prima flowers, etc., because this will be too thick. You want you bookmark to be flat so that it lays nicely in your book and doesn't blemish or mark the pages of your book.
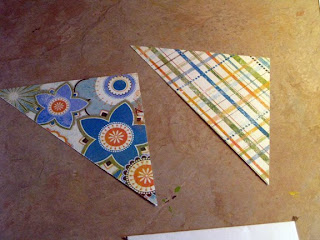 Next you need to cut your patterned paper to cover the base with. You can either measure it like you did above for the envelope, or place your base on the corner of the patterned paper and use it as a template to mark the patterned paper. Cut one triangle from each piece of patterned paper, or two of the same.....or just one for the front. You don't have to cover the back really, unless you want to! lol Adhere the patterned paper to the front and back (or just front) of the bookmark base. I use a glue runner and I run the glue all the way around all three sides, as close to the edge as I can. I don't like the paper to gap between the patterned paper and the envelope base, if that makes any sense. It also keeps it nice and smooth and stays together better....helps keep the edges nice and flat.
For this bookmark, I cut a piece of the patterned paper that I was using for the back that was about 1/2-inch thick and then cut along one edge with some scallop deco scissors. I then put it on the side of the triangle where the opening pocket is. Then, I turned it over and trimmed off the excess.
So, here is my finished bookmark. I really love how this one turned out!
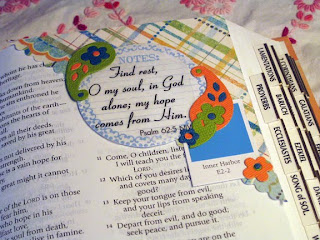 Find Rest, my soul, in God alone; my hope comes from Him. - Psalm 62:5
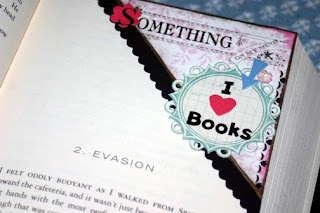
And here are some other bookmarks that I have made as some more inspiration for you!
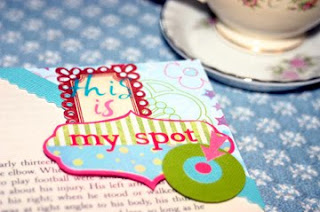 This is my spot
I made this one for my 13 year old daughter who has her nose in a book as much as I do....all of the time! lol
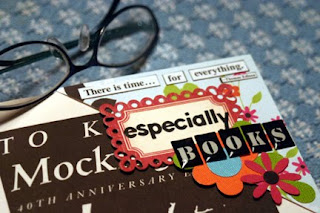
There is a time....for everything (Thomas Edison)
especially BOOKS
especially BOOKS
I hope you enjoyed this tutorial and that it all made sense! If you have any questions, please ask! I'll do my best to help! And, if you make one of these bookmarks, I would LOVE to see them! Share you link in a comment here!
Take care my friends and happy crafting!




9 comments:
ally Love this and I am for sure gonna try one....Thanks so much Di for sharing with us.
Wanda:-)
--{--@
What a neat idea. Will have to give this a try.
Thanks for sharing hon. I LOVE to read and get sick of using stray papers to mark my place!
I love this! Thanks for the tutorial.
such a cute idea! I love how the bookmarks look in the book!
I love this projct. Great tutorial.
Okay... very, VERY clever! This just moved up to the top of my to-do list. Thanks for sharing! I'll be linking and would love it if you joined my image link party at childmade.com.
Love the idea. I always need bookmarks and it looks like it won't warp the pages
I am a bookworm, and I love these.I think they will make great Valentines.
Thanks for the tutorial.
Post a Comment